
Published: March 31, 2016 | Last updated: September 15, 2023
The ProvenExpert rating seal is embedded in this example.
Before we start, a short note: Not every email service allows embedding a rating seal into the email signature. It's possible with Outlook, Apple Mail, Thunderbird, and Gmail, but not with certain email clients such as GMX or Web.de. We will demonstrate using Outlook 2010 (for Windows) and Apple Mail. Select HTML as send format to ensure that the email signature will display properly. In the case of Outlook, this should already be selected by default.
1.2 Customize rating seal and generate HTML code
1.3 Add graphic to signature
1.4 Add a hyperlink to the ratings profile
2. Embed the ProvenExpert seal in Apple Mail
2.2 Open HTML code using the file path
2.3 Use generated HTML code
1. Integrate the ProvenExpert seal in Outlook (Windows)
In this section, we will use Outlook 2010 for Windows operating systems to show how to embed the ProvenExpert seal into your email signature. The steps shown here only apply to the Windows version of Outlook. While it is possible to embed graphics in Outlook for macOS systems, loading dynamically generated graphics is currently not supported. Therefore you need to update the embedded image file manually on a regular basis.
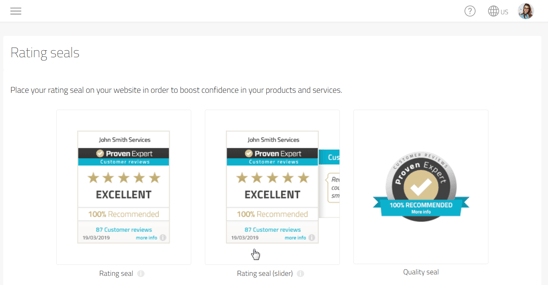
1.1 Select rating seal
Choose a rating seal for your email signature. Log in to your ProvenExpert profile and go to Reputation Boost in the site navigation and click on “Rating seals”. Note: The slider rating seal, the seal at the lower browser edge and the rating widget aren't suited for embedding.
1.2 Customise rating seal and generate HTML code
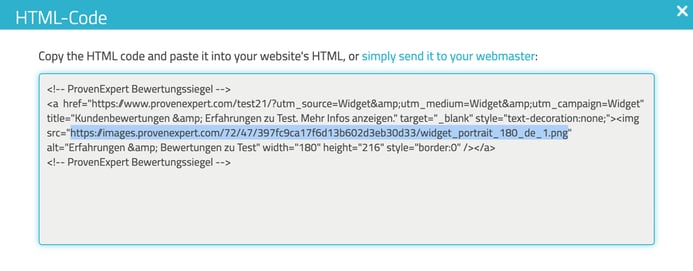
You can now adjust the rating seal. We recommend adding the smallest size (90 x 108) to your signature. If you also want to display a customer evaluation, the seal must be at least 125 x 150 pixels. Click on “Generate HTML code”. This will open a window that displays the source code.
Customize your selection & click on “Generate HTML code“
A corresponding dialog will open. Copy the second link in the source code (see screenshot):
1.3 Add graphic to signature
Now in Outlook, go to “new message” and then to “Signature” -> “Signatures...”. Click on the icon “Insert Graphic”. A file selection dialog opens.
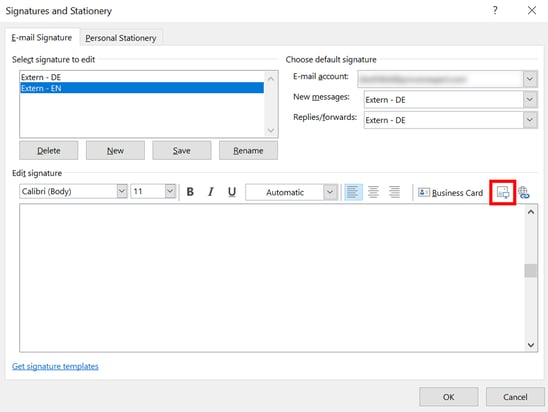
Click on the red icon “Insert Graphic icon” to open the file selection dialog.
Your URL will appear differently, but don't let this bother you. Everything starting from https: until .png must be copied without quotation marks. Now go back to the Outlook file selection dialog, insert the copied link in „File name:” then click on the arrow next to „Insert“ ans use the option „Link to File“. Now the ratings seal graphic will appear in your signature.
If you would like to embed the dynamic seal, click on Link to file.
Important:
If you are inserting the dynamic seal, please don't click on „Insert“, but rather on the little arrow to the right and then on „Link to File”. This ensures that the seal is synchronized with every rating in real time.
Notice:
When nothing happens when you click on „Link to File“, please instead use the option „Insert and Link“ and remove the appearing image afterwards. Then try the option „Link to File” again.
1.4 Add hyperlink to the ratings profile
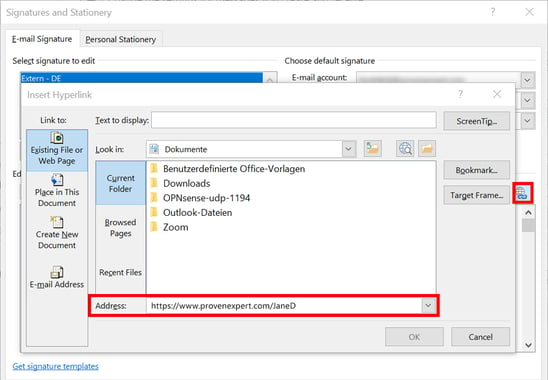
In the last step, link the ratings seal graphic to your ProvenExpert profile (your profile must be public to do this) to ensure transparency for your customers. Click in the Outlook signature dialog first on the seal and then on the icon “Insert hyperlink”; a dialog will open. Copy the first marked link in the source code (see screenshot):
Select and copy the link to your ProvenExpert profile from the source code
As you must have noticed, this is your ProvenExpert profile's URL. Go back to the Outlook dialog window. Insert the copied link to “Address:” and click on “OK” in Settings.
Done! You ratings seal is now embedded in your email signature and will now be displayed in every email you send.
2. Integrating the ProvenExpert seal with Apple Mail
Now we describe embedding the ProvenExpert seal in Apple Mail signatures (using MAC OS X 10.5).
2.1 Write signature text and make presets
Open Apple Mail and click on “Signatures”. On the left, select the email account for which you would like to create a signature.
Then click on “+” in the second column and give your signature a name (here: HTML). In the right column, provide your desired signature text and add a placeholder where the ProvenExpert seal should be positioned. In our example, we called the placeholder “LOGO”.
The placeholder for the seal is “LOGO” .
Now, next to “Signatures”, click on the field “compose”, and in the first line in Email format, select “Formatted Text”. Now, go to the “Display” field and set a checkmark next to “Load removed contents in messages” or “Display not locally saved images in HTML emails” (this depends on the Apple Mail version). Following these steps, close the Apple Mail program.
2.2 Open HTML code using the file path
Now open the folder “Library folder”. On Desktop, go to “Finder” and then, under “Go to”, select the Library folder.
Open the “Library” using the “Alt key”.
Open the Mail subfolder > V2 > MailData > Signatures
If you use iCloud, follow this path: Mobile Documents > com~apple~mail > Data > MailData > Signatures
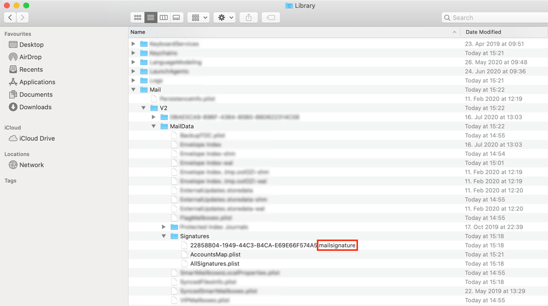
In this example, the top mail signature file has been edited last
Select the file ending in “mailsignature”. If there are several files, select the last used one.
At this point, you will probably get a message that no program can open this file. If this happens, click on “Select program or application:” and pick “TextEdit.app”. The file will open, and the signature source code will display.
2.3 Implement generated HTML code
Log into your ProvenExpert profile and copy the generated HTML code of your seal. You can find out how to generate the HTML code in sections 1.1 and 1.2.
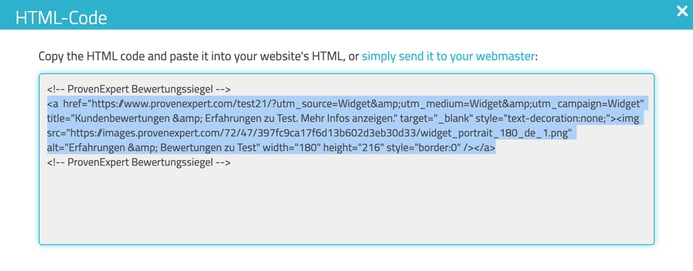
Please copy the entire seal code as shown in this example.
Now insert the copied HTML code into the file (signature source code) that you opened with TextEdit.app. In our example, we simple REPLACE the word LOGO (which we entered as a placeholder before) with the copied HTML code, save, and close the file.

Insert the copied HTML code in place of the word “LOGO” (or instead of your placeholder)
If you now open Apple Mail and choose “New message”, select HTML to the right of “Signature” “HTML”.
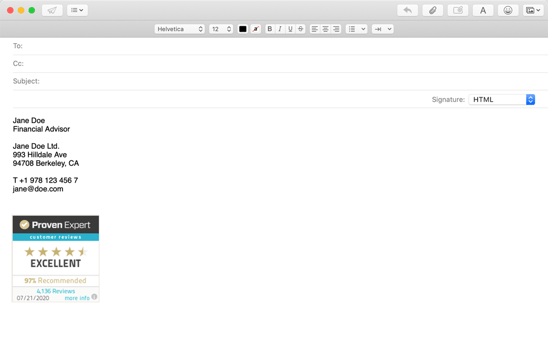
To the right, select “HTML” to display the seal graphic correctly.
Done! Your ProvenExpert seal is now embedded in your email signature and will appear in your sent emails.
Want to take control over your reputation? Manage your reviews with ease on ProvenExpert now.
